
How to: Create vertical video for instagram in premiere pro

Here is my little handy guide on how to do that. I created it as a reminder and quick reference for myself but if you come across it and find it useful then brilliant!
As I am sure you know, Instagram is hugely popular and a great way to share photos and videos. A quick Google for stats on Instagram and I found that 1 billion people use Instagram every month and of those 1 billion visitors 200 million of them will visit a business profile each day.
https://blog.hootsuite.com/instagram-statistics/
No surprise then that many businesses have a presence on Instagram and of course you might wish to upload your own creative video content as well as video content you create for your clients.
With a 16:9 ratio landscape video uploaded to the platform you are not maximising the screen and your beautiful landscape video looks pretty small.
Best then to upload a video in a vertical format. The size of vertical video I create is:
1080 pixels wide
1920 pixels high
This gives a 16:9 ratio and is perfect for reels. If you create the vertical video in Premier Pro you can be sure to get the best results on Instagram.
My preferred way of working is to create my edit as normal in a sequence. I shoot my video in HD at a 1920 wide by 1080 high resolution so the sequence I am creating in the edit has those settings. Once I have my edit done and I am ready to export I first export out my widescreen HD versions for YouTube etc.
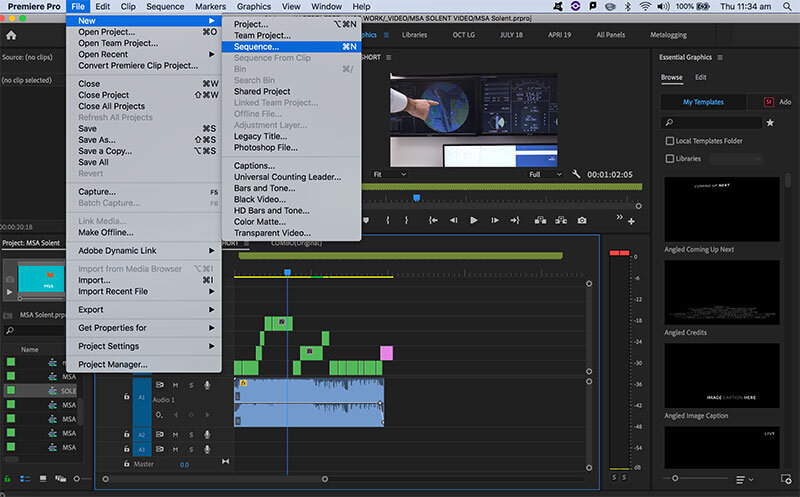
Then when I am ready to create a vertical video version I create a new Sequence by selecting File> New>Sequence:
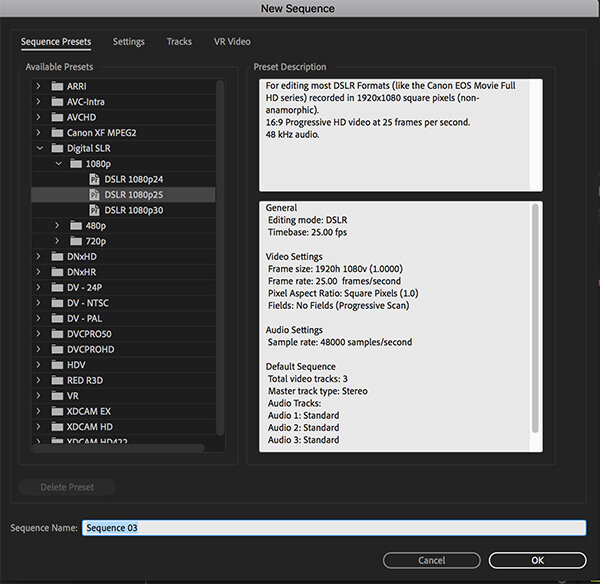
Up pops the next window. I usually film with a DSLR camera at 25 frames per second at 1080 so my settings correspond to that:
Next go over to the project panel and right click on the new sequence you just created and select Sequence Settings…
In the window that pops up change your width and height settings to:
1080 pixels wide
1920 pixels high
and be sure to keep square pixels checked:

In my new sequence I drag in the original main sequence. Super handy that you can embed a sequence in a sequence. Up pops a window:
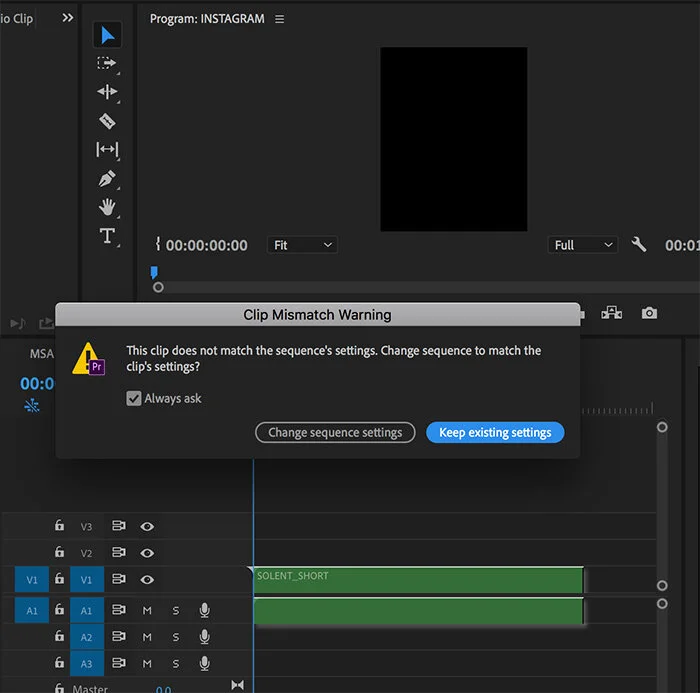
Be sure to Keep existing settings. The other way to do it is to copy everything from your original sequence (all your clips and audio) in to the new vertical format sequence.
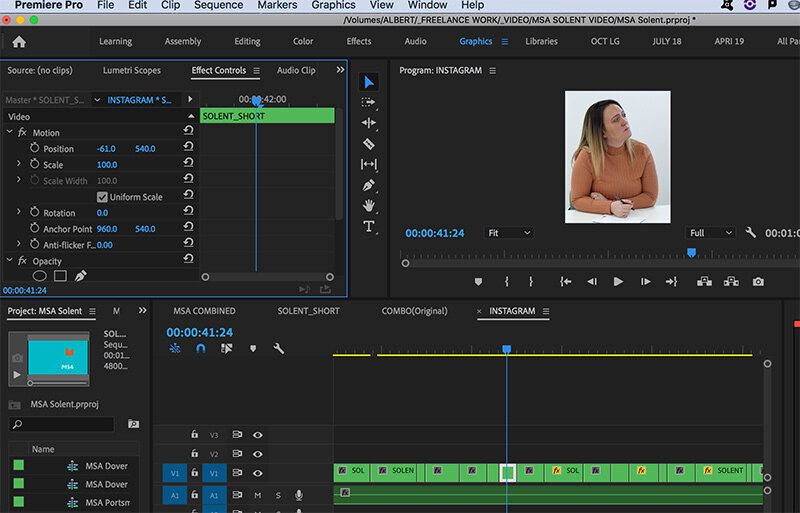
Next go through your footage and look for any scenes where you need to make an adjustment. For example I needed to adjust of this scene of a person sitting at a table:

Because I pulled in the original sequence I used the cut tool to make the scene in to a clip and then I used the effect controls panel to move the clip to the left:
Go through your time line making adjustments as required.
Then when you are done export and upload to Instagram. Just make sure your export settings match the width and height of:
1080 pixels wide
1920 pixels high
Hope you found that useful! Find me on Instagram at @cosmicegguk

Written and published by
Steve Hogg
11 April 2020